Setting up SSO and provisioning with Microsoft Entra ID requires specific permissions. To connect your Identity Provider and automate account management, you must have rights to “Manage company settings”, "Manage users", and "Manage user groups" in Contractbook. Ensure you have these permissions enabled before proceeding, or contact your Company administrator for help.
Once enabled, follow these steps to set up the integration.
Prerequisites
Administrator access to your company’s Microsoft Entra admin center.
A valid Contractbook API key. You can request your SSO API key from Contractbook Support team.
A working Entra ID setup with the users from your organization you want to synchronize with Contractbook.
A secret token for an admin user, provided to you by the Contractbook Support team.
Our Tenant URL: https://api.contractbook.com/scim.
Create the enterprise application
Log in to the Microsoft Entra admin center.
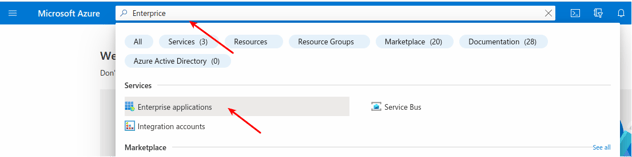
Navigate to Identity, select Applications, and click on Enterprise applications.
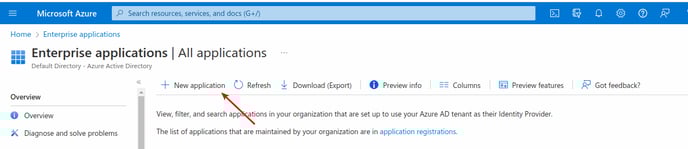
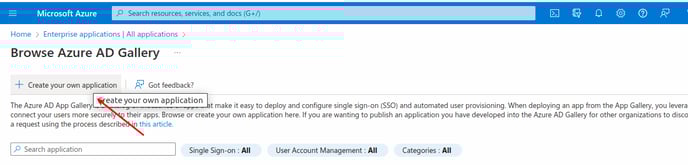
Click + New application and select Create your own application.
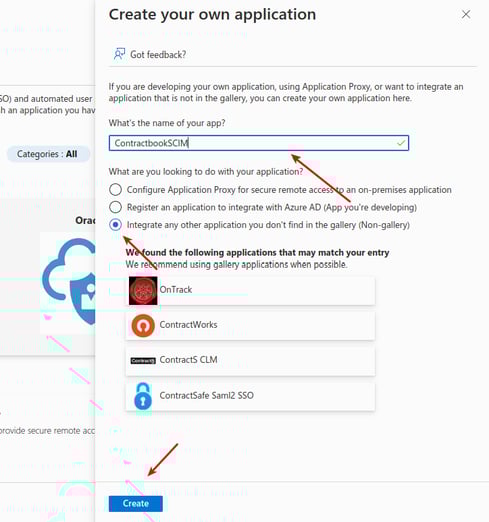
Type "Contractbook" in the name field and ensure Integrate any other application you don't find in the gallery (Non-gallery) is selected.
Click the Create button.
Configure single sign-on (SAML)
Select Single sign-on from the left sidebar in your new application and choose SAML.
Enter the Identifier (Entity ID) and Reply URL found in your Contractbook company settings in the Basic SAML Configuration section.
Scroll down to SAML Certificates and download the Federation Metadata XML.
Upload this file to the SSO section of your Contractbook company settings to complete the handshake.
Enable SCIM user provisioning
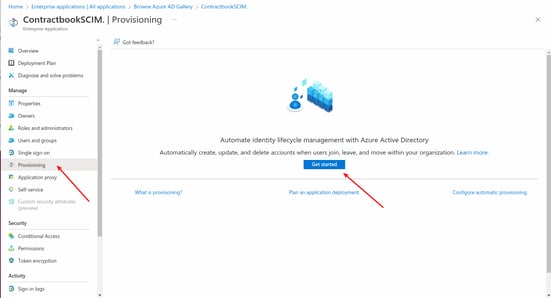
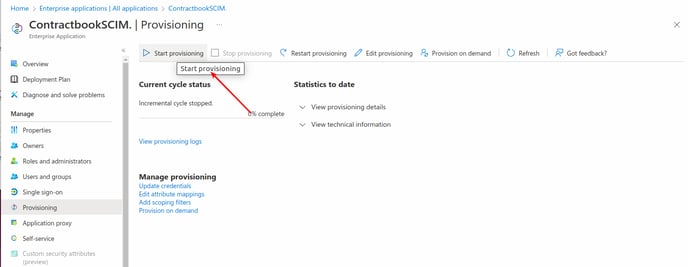
Select Provisioning from the sidebar and click Get started.
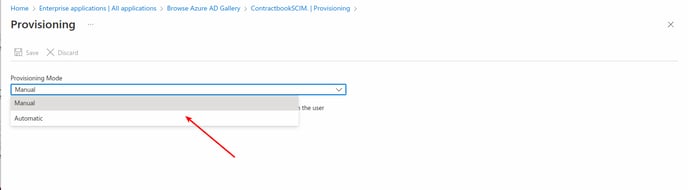
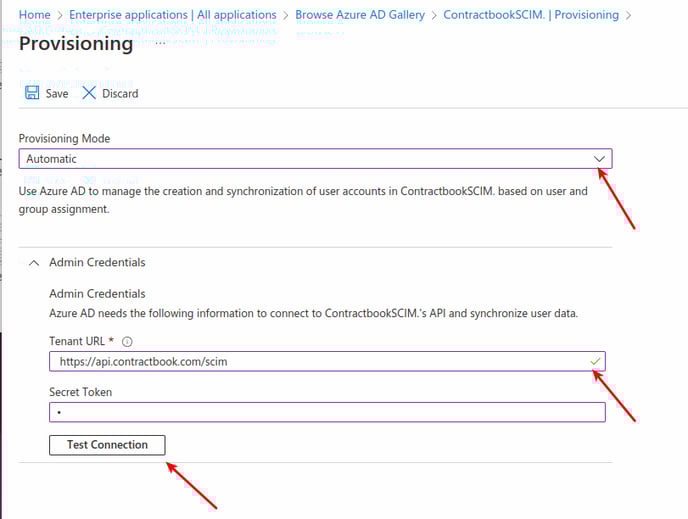
Select Automatic from the Provisioning Mode dropdown menu.
Type https://api.contractbook.com/scim/v2 into the Tenant URL field under Admin Credentials.
Paste your Contractbook API key into the Secret Token field.
Click Test Connection.
Click Save once the connection is successful.
Check the Mappings section and ensure both Provision Microsoft Entra ID Users and Provision Microsoft Entra ID Groups are enabled.
Save this configuration if everything succeeds.
Assign users and user groups
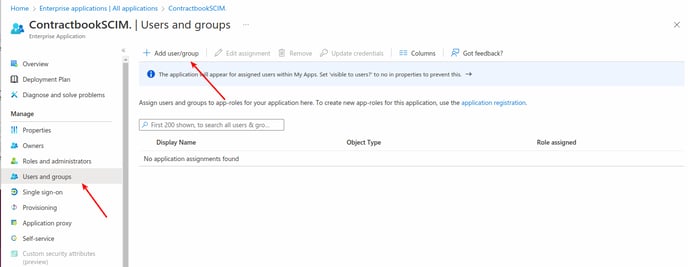
Navigate to Users and groups in the sidebar.
Click + Add user/group.
Select the specific users or user groups that require access to Contractbook. If you are wondering how to provision user groups, the process is the same as for individual users, and this action creates a corresponding User group in Contractbook to give collective access to the right shared Spaces.
Wait for Entra ID to automatically sync these accounts to Contractbook.
Important management shift
Manage all users and user groups exclusively through MS Entra ID once this integration is active.
Note: the ability to invite and manage users directly within the Contractbook Users page under the Company section of your account Settings will be disabled.
Accepting permissions on behalf of the organization
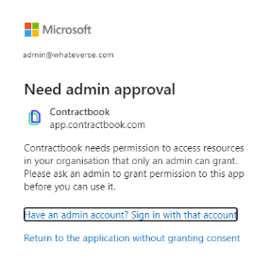
Note that for specific Azure Active Directory setups, an admin must obtain the licenses on behalf of the organization so users can utilize Contractbook's Single Sign-On (SSO).
Instruct the admin to log into Contractbook's main platform and manually accept the permissions if users receive a "Need admin approval" error.
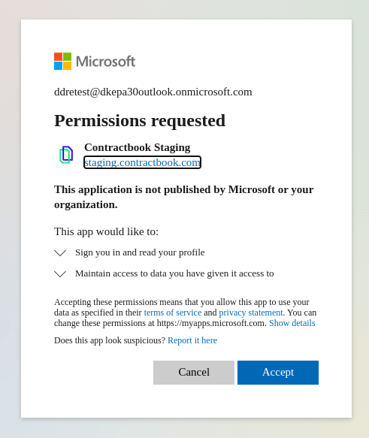
Note: User groups is a premium feature that is not included in all plans. If you do not see the option to manage user groups under your Company settings, please reach out to your Customer Success Manager for more information on how to get this feature.
Provisioning Users
- Click the Users and groups under Manage and configure the users you want to sync with Contractbook.
- Please note that at least one organization admin should be present in the users selected. This is required for certain Active Directory setups where the admin needs to accept Contractbook's permissions on behalf of the organization:
- Click Provisioning under Manage, and click Start provisioning:
Related Articles
Was this article helpful?
That’s Great!
Thank you for your feedback
Sorry! We couldn't be helpful
Thank you for your feedback
Feedback sent
We appreciate your effort and will try to fix the article