Setting up SSO and provisioning with Okta requires specific permissions. To connect your Identity Provider and automate account management, you must have rights to “Manage company settings”, "Manage users", and "Manage user groups" in Contractbook. Ensure you have these permissions enabled before proceeding, or contact your Company administrator for help.
Once enabled, follow these steps to set up the integration.
Supported features
Identity Provider (IDP) - Initiated Authentication (SSO via OpenID Connect) Flow: This authentication flow occurs when your company users attempt to log in to Contractbook directly from Okta.
Automatic account creation: Generates a new profile in Contractbook on the initial SSO login.
Prerequisites
Ensure you have a working Okta setup with the users from the organization you wish to synchronize with Contractbook. You must meet the following configuration requirements:
Access to an Okta tenant.
Be an Okta administrator for that tenant.
Sign-in redirect URIs: https://app.contractbook.com/login/sso/okta
Sign-out redirect URIs: https://app.contractbook.com/logout
Create SSO app integration in Okta
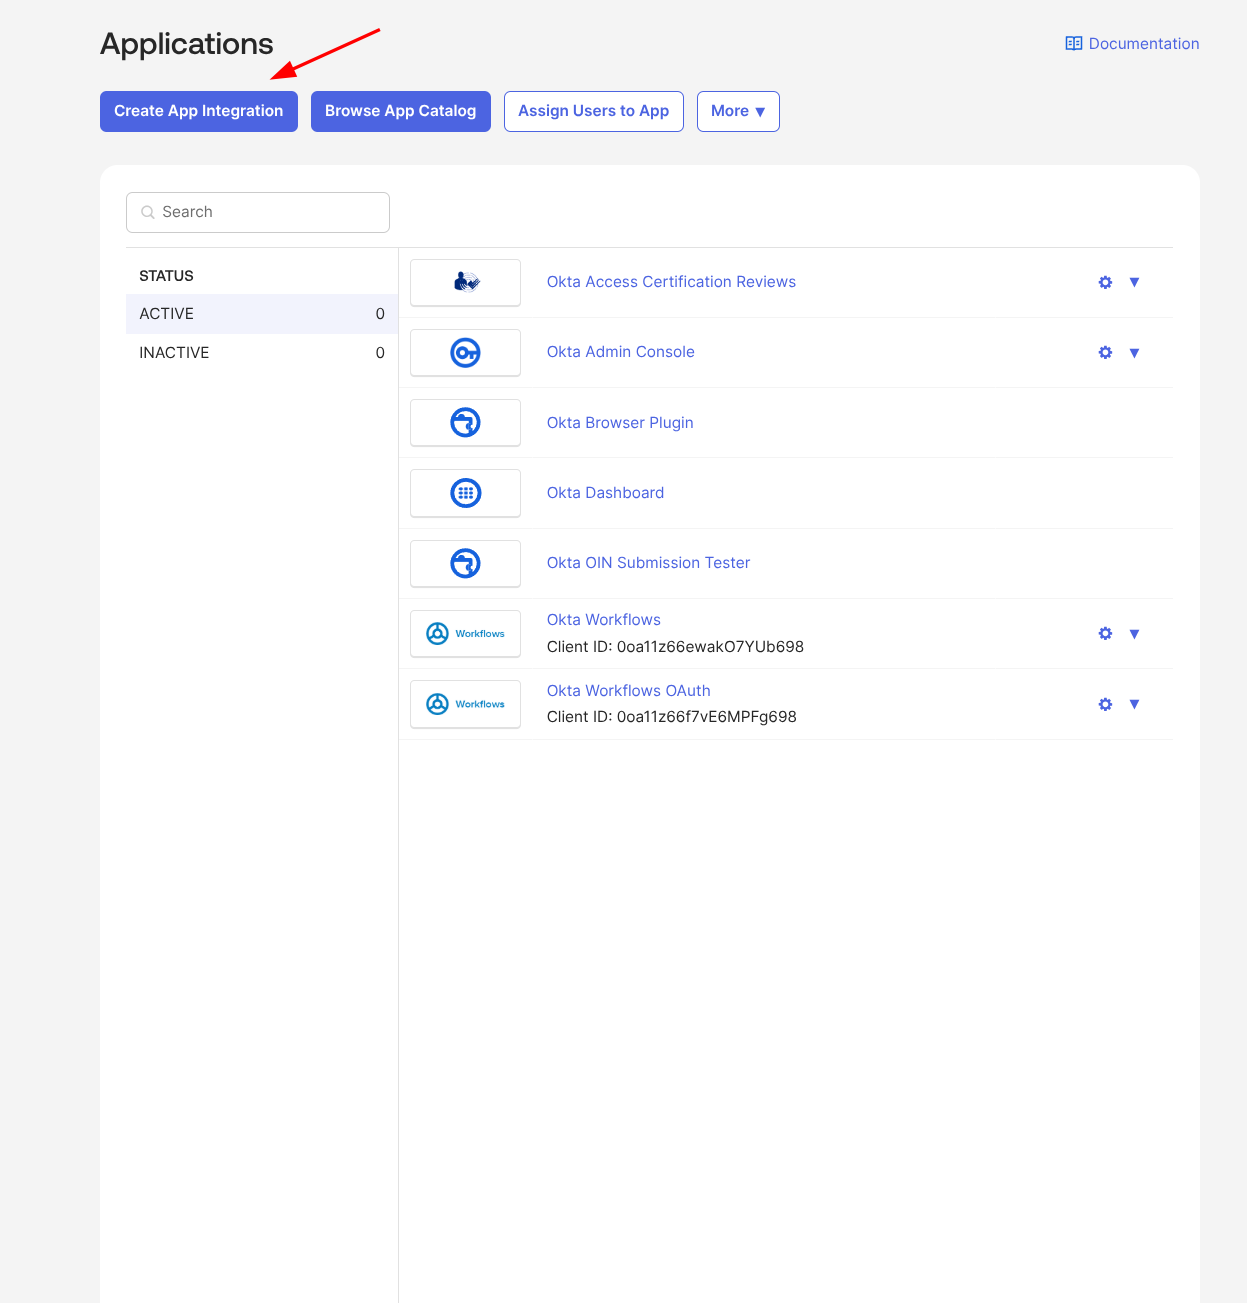
Navigate to your organization's Okta account and select the Applications menu.
Click the Create App Integration button.
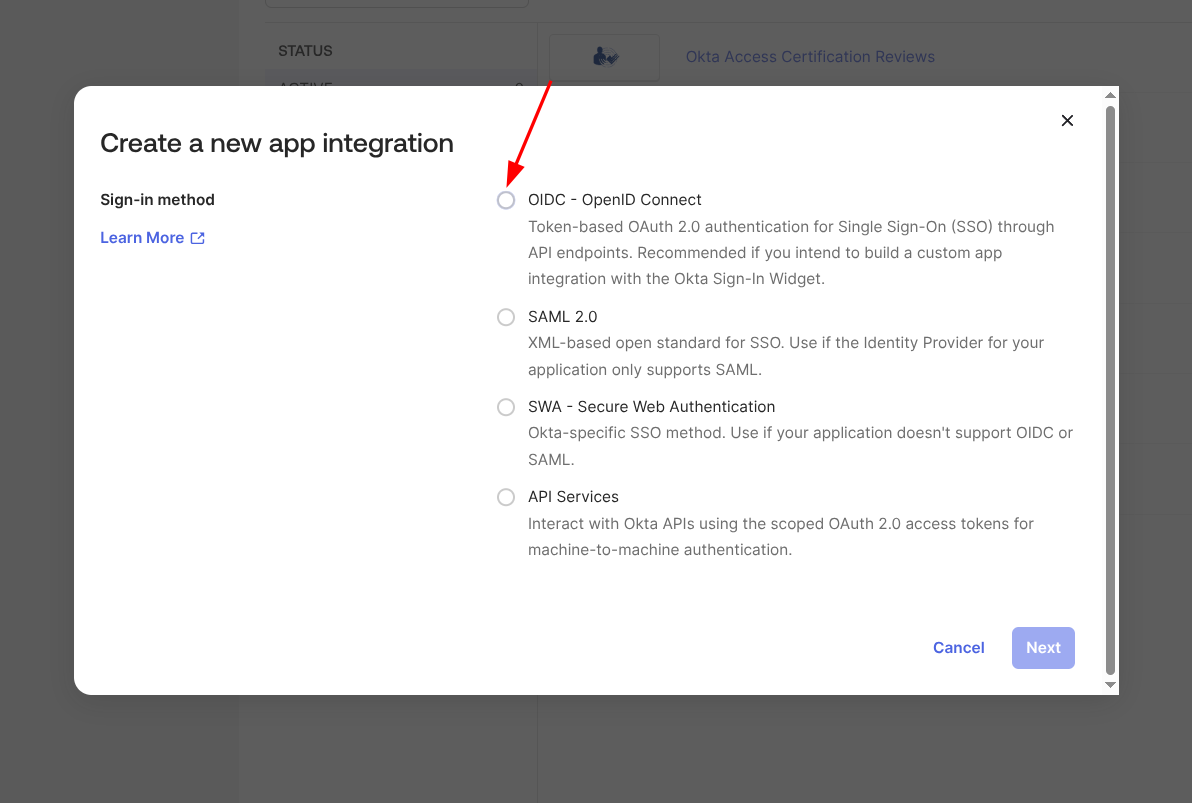
Select OIDC - OpenID Connect as the Sign-in method.
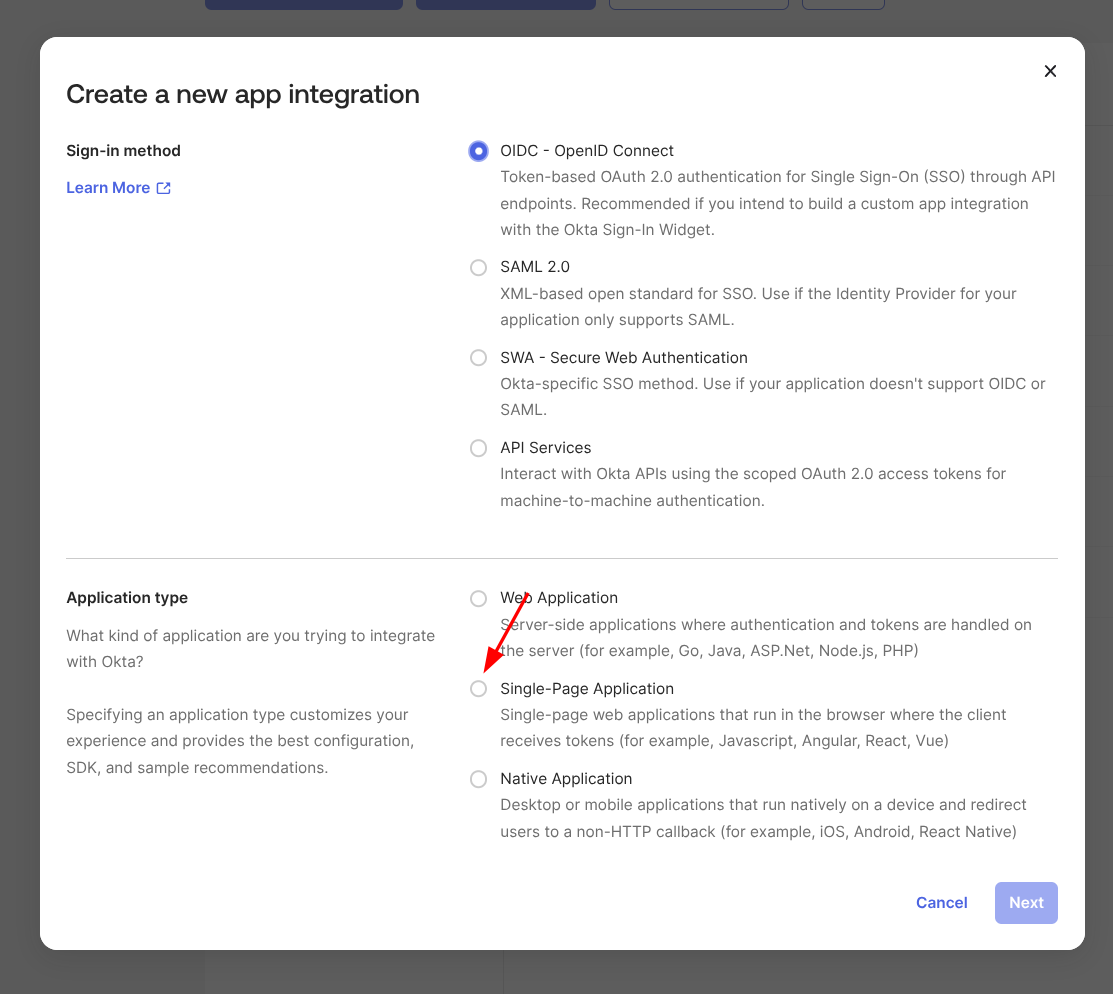
Select Single-Page Application as the Application type and click to proceed.
Enter a name for your application.
Check Authorization Code under Grant Type.
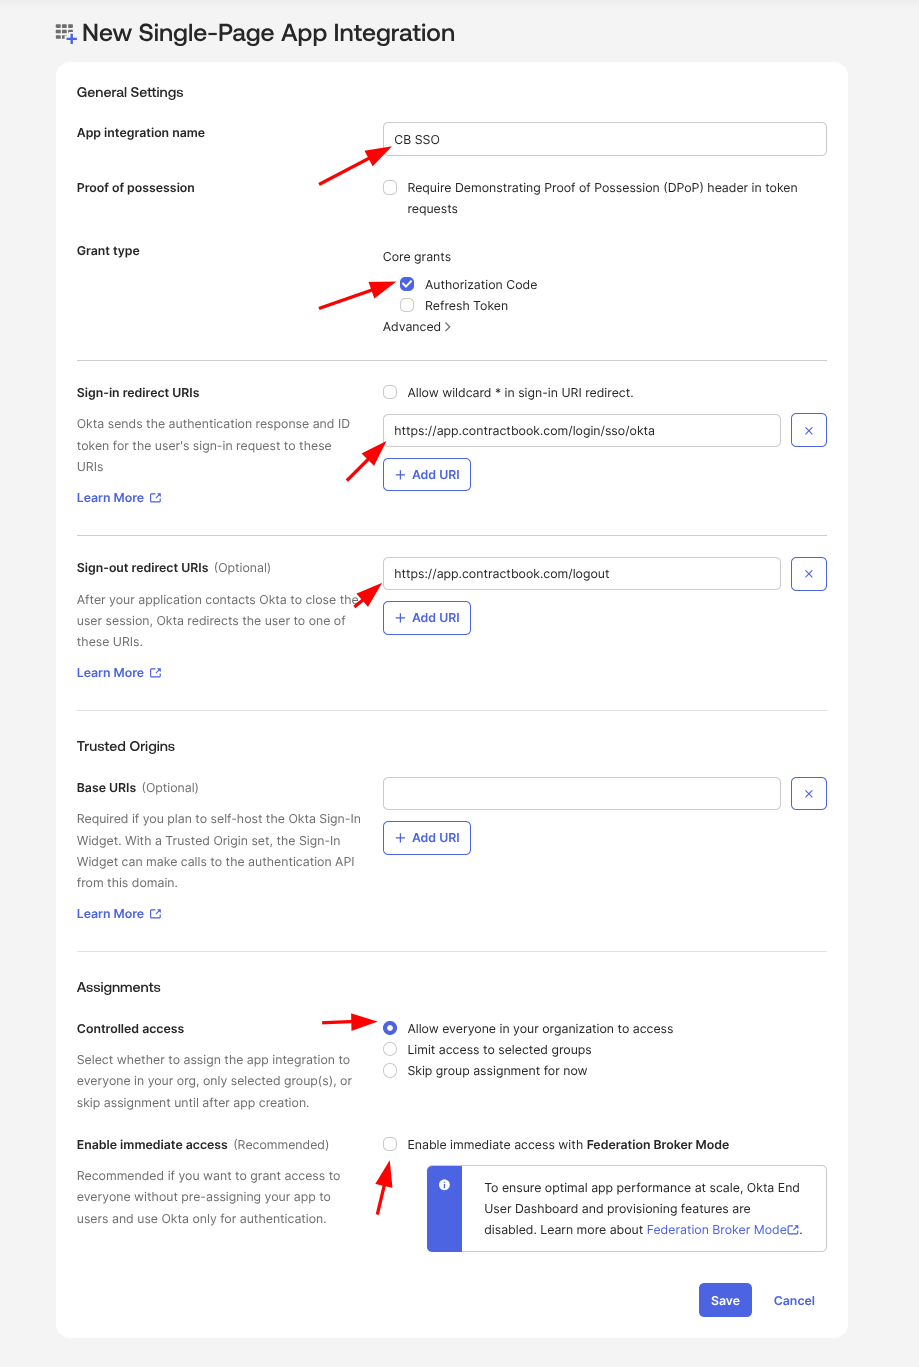
Paste the sign-in and sign-out redirect URIs provided in the prerequisites.
Leave Trusted Origins blank.
Leave Enable immediate access unchecked under the Assignments section.
Configure SSO connection
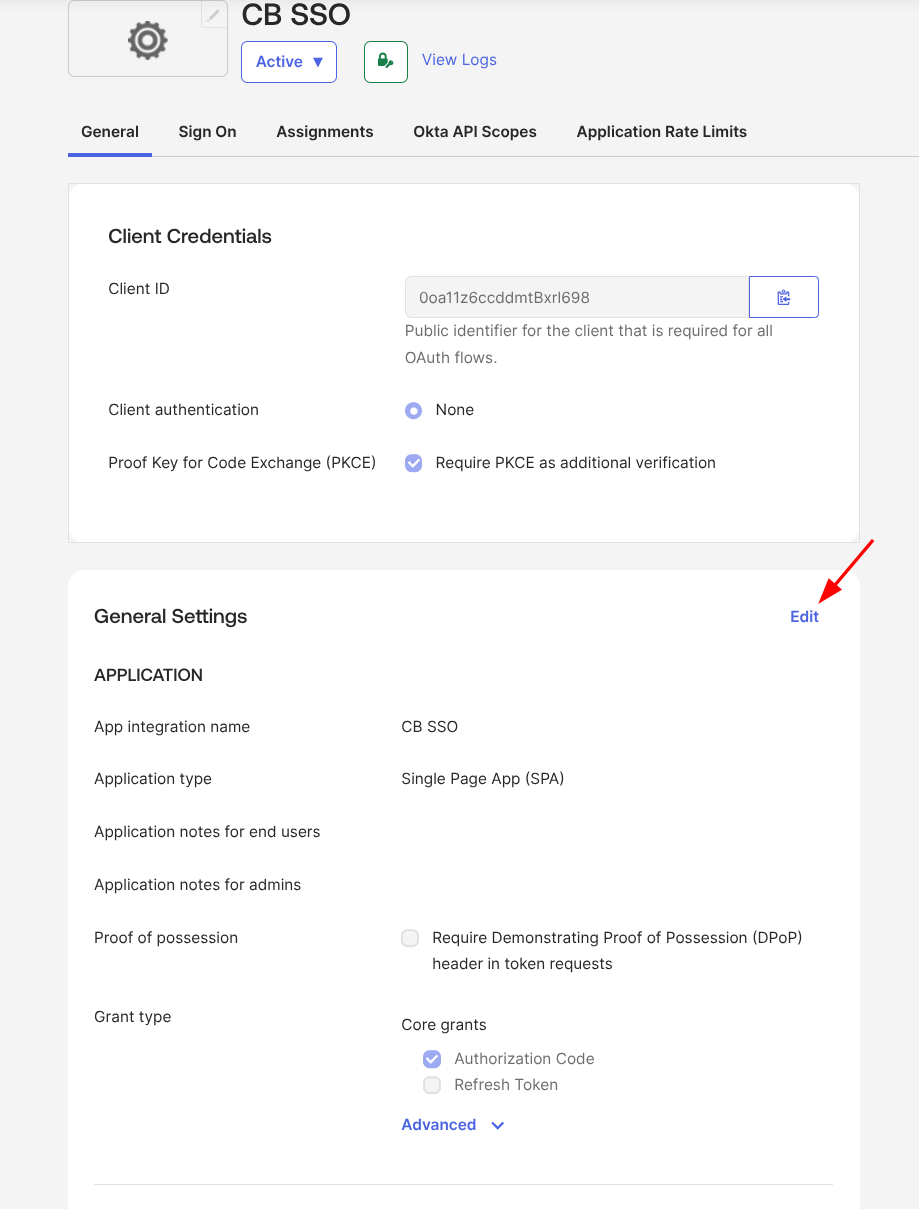
Go to the General settings tab of your new application and click Edit.
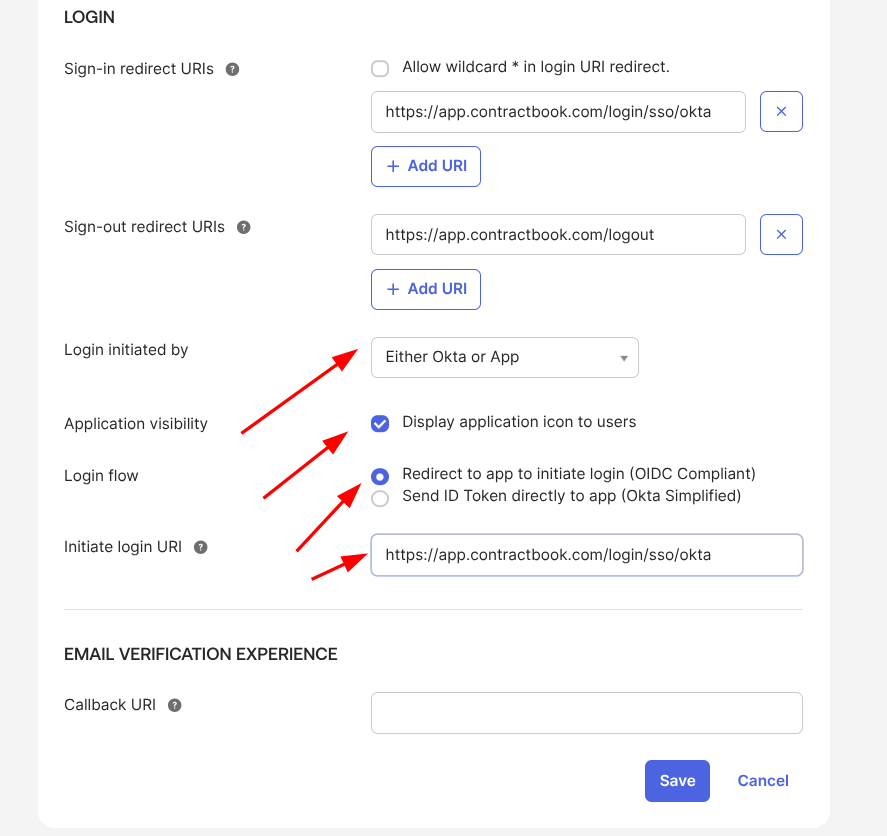
Change Login initiated by to Either Okta or App.
Update Application visibility as needed.
Set the Initiate login URI to the exact same address as the sign-in redirect URI.
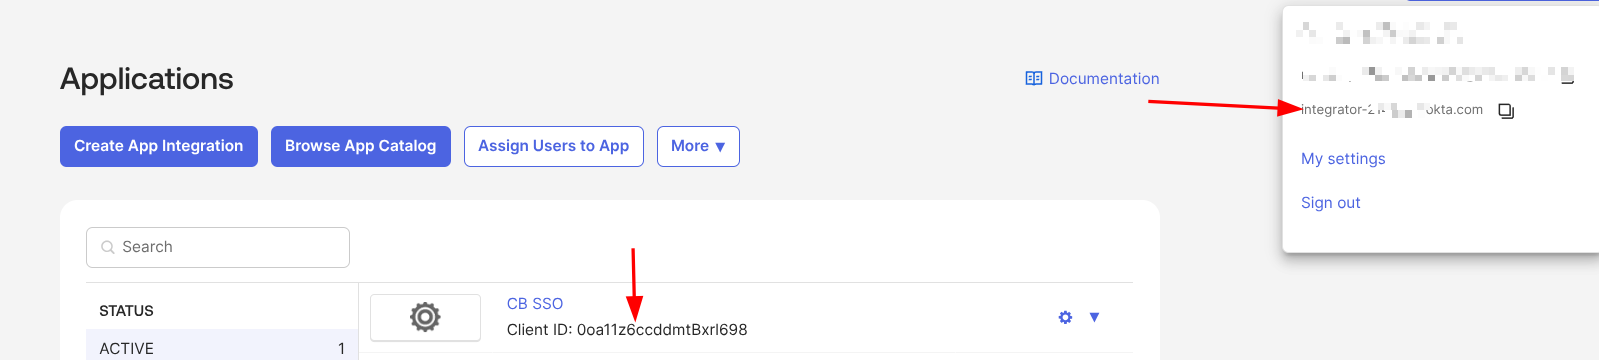
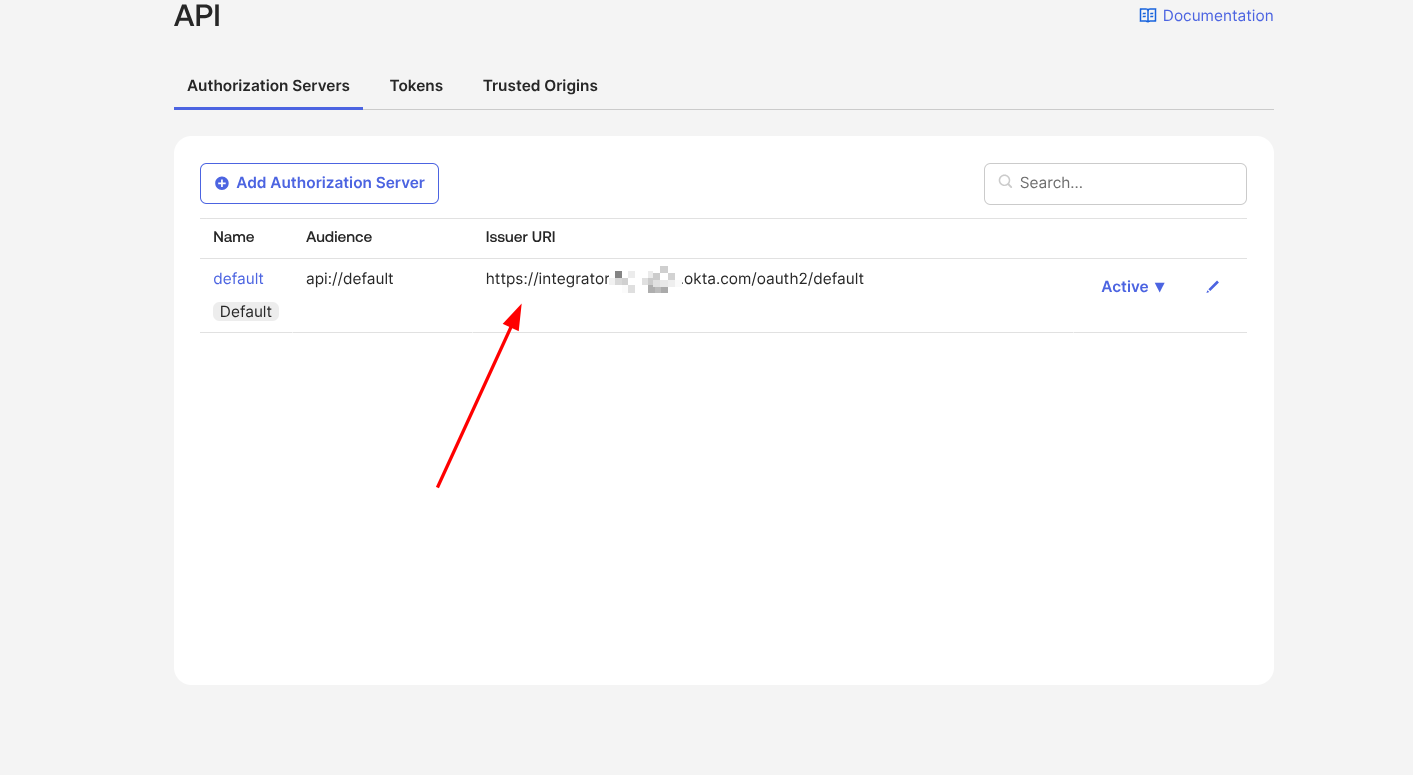
Send your Okta Organisation ID, Application ID, and Issuer URI to the Contractbook Support Team to finalize the connection.
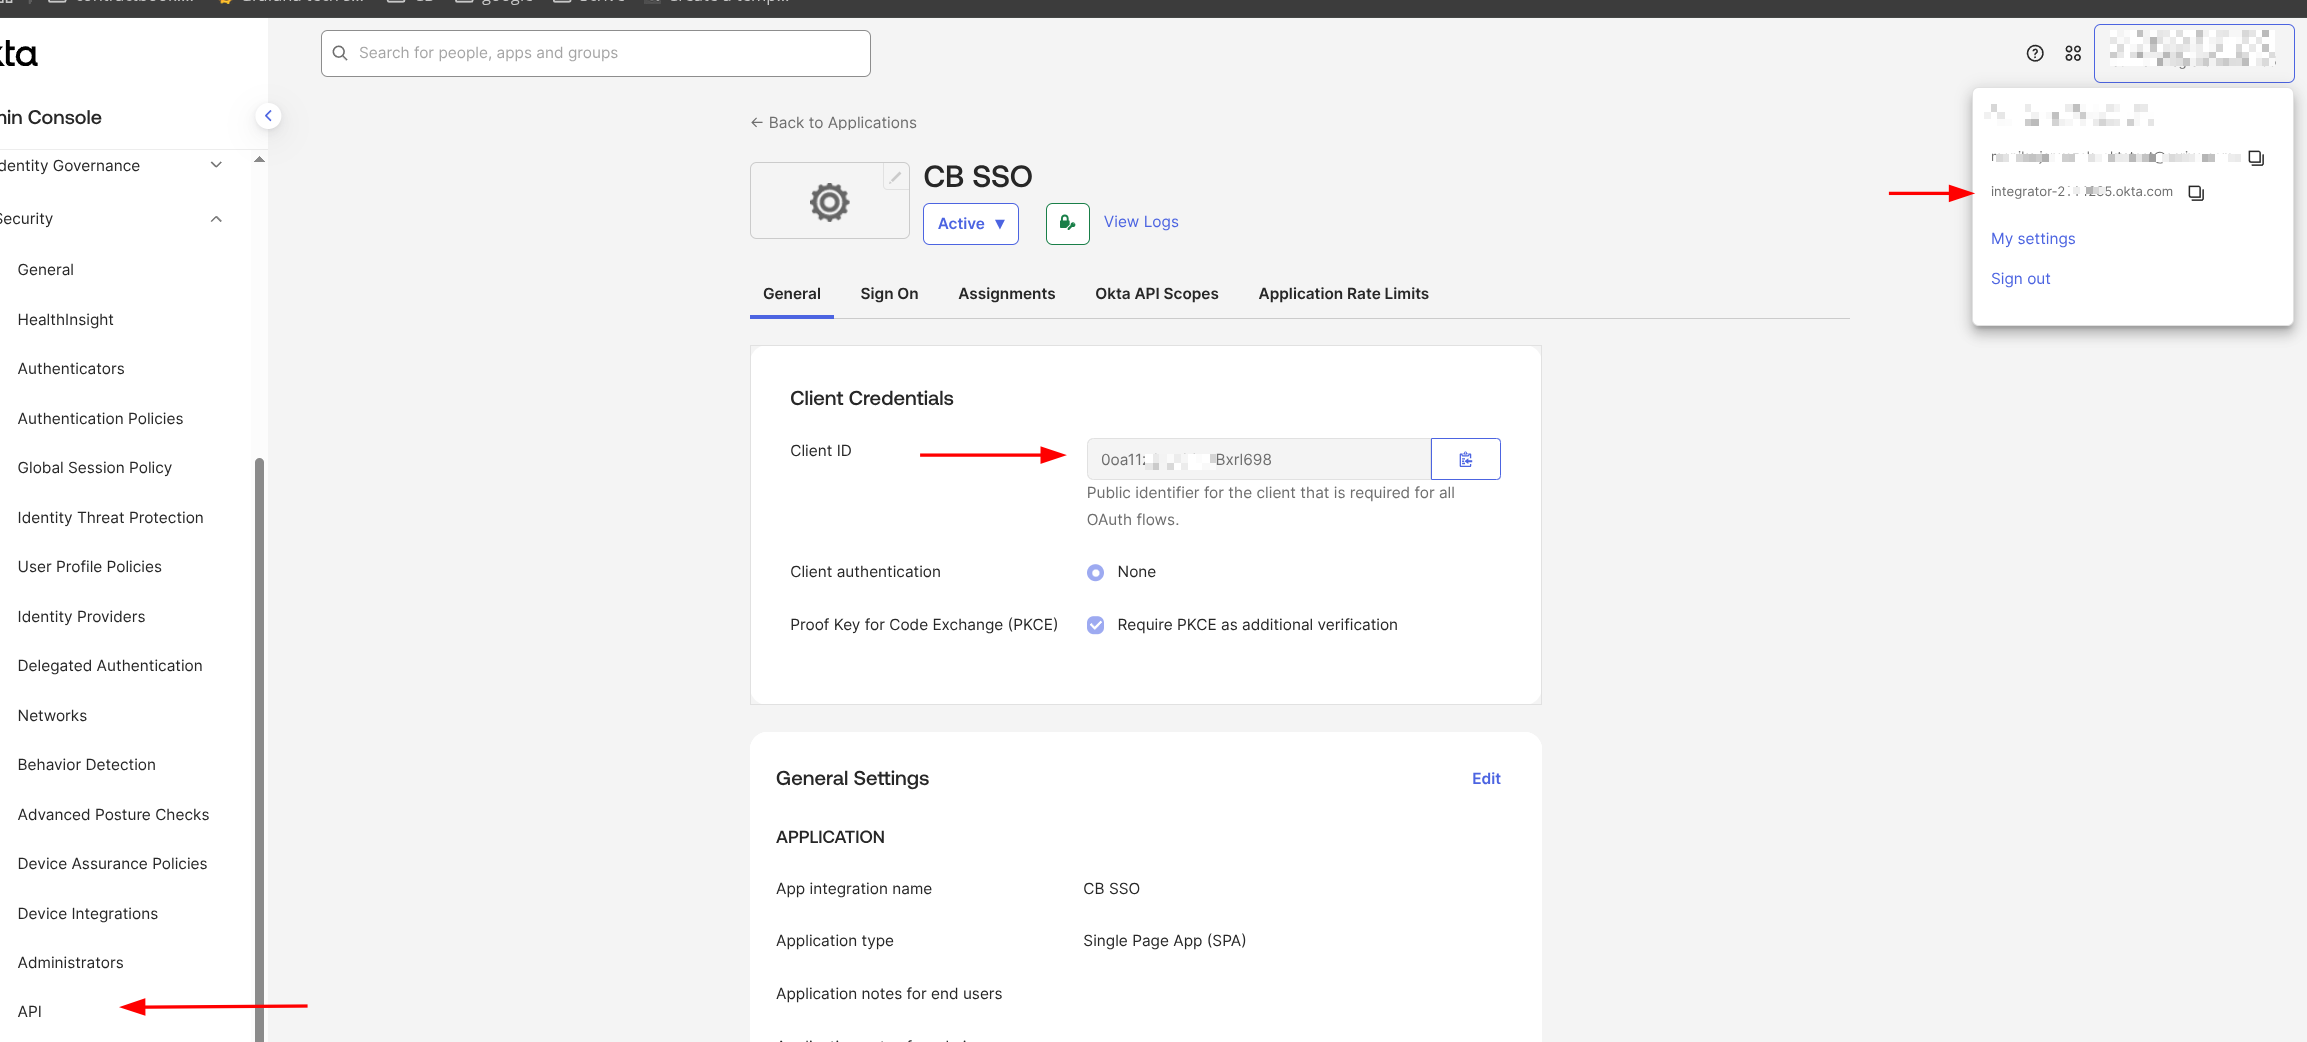
Verify you have access to the API > Authorization Servers settings to find your Issuer URI.
Set up SCIM 2.0 provisioning
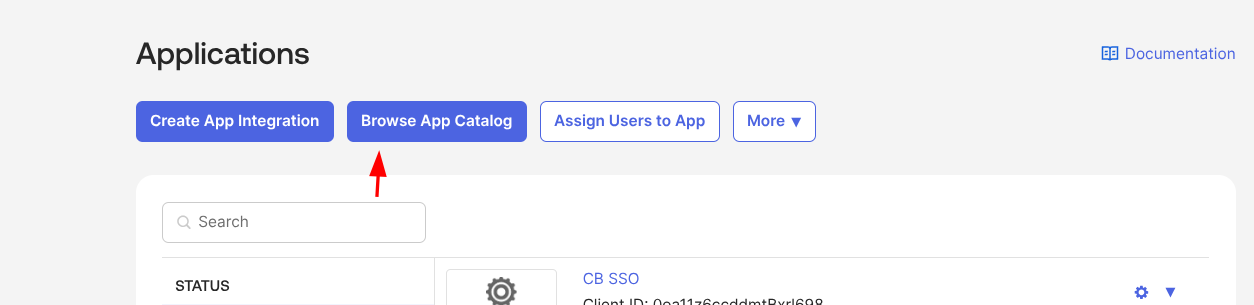
Go to the Applications section in your Okta account.
Click Browse App Catalog.
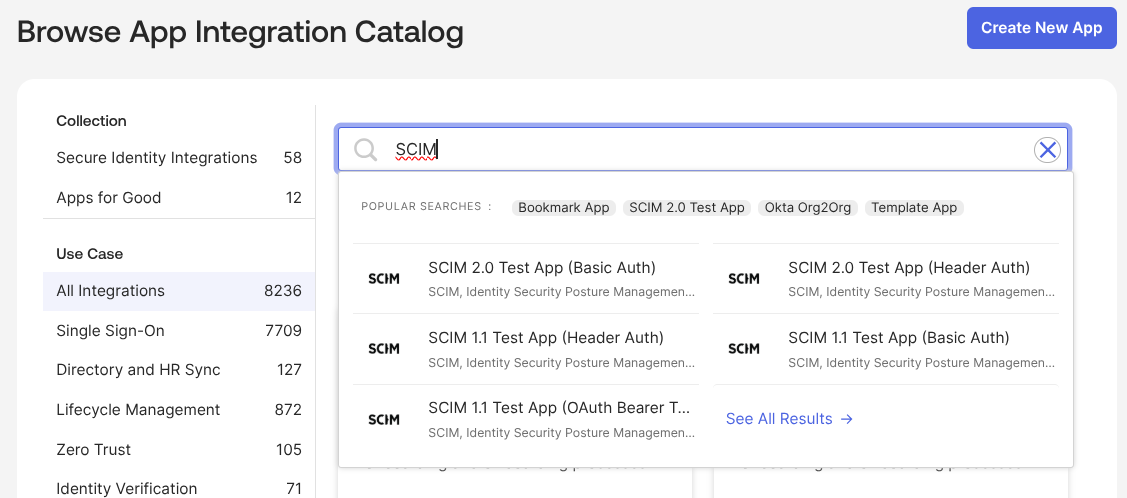
Type "SCIM" in the search bar and select SCIM 2.0 Test App (Header Auth).
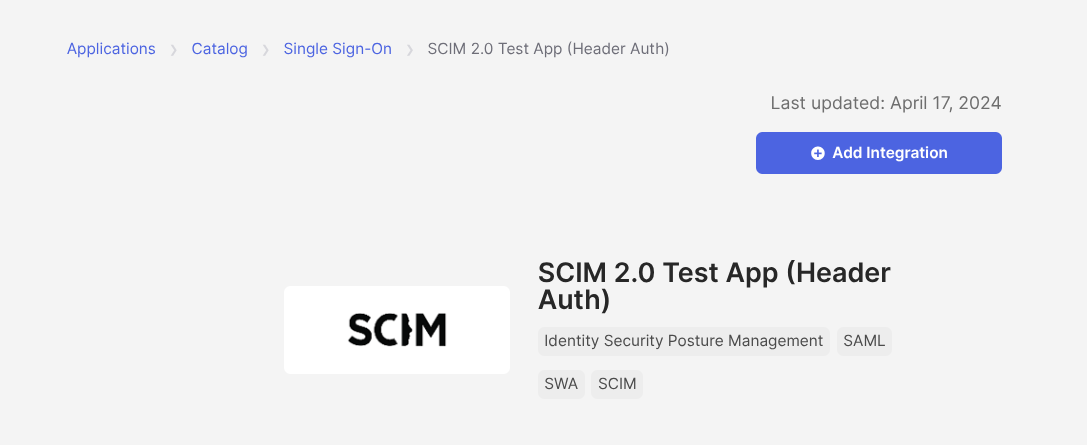
Click Add Integration.
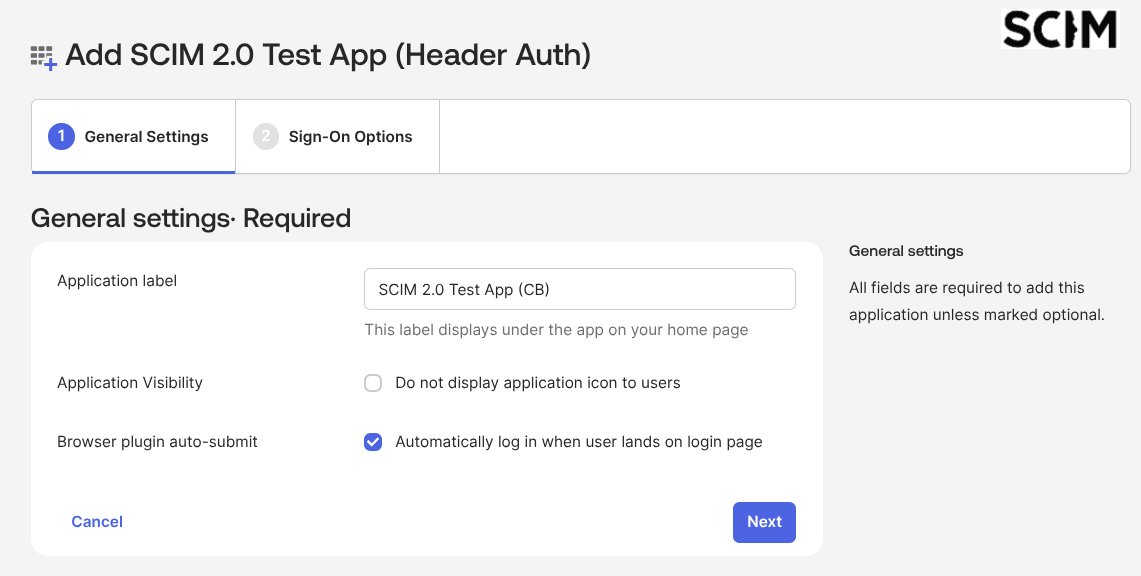
Enter your preferred name for the application and click Next.
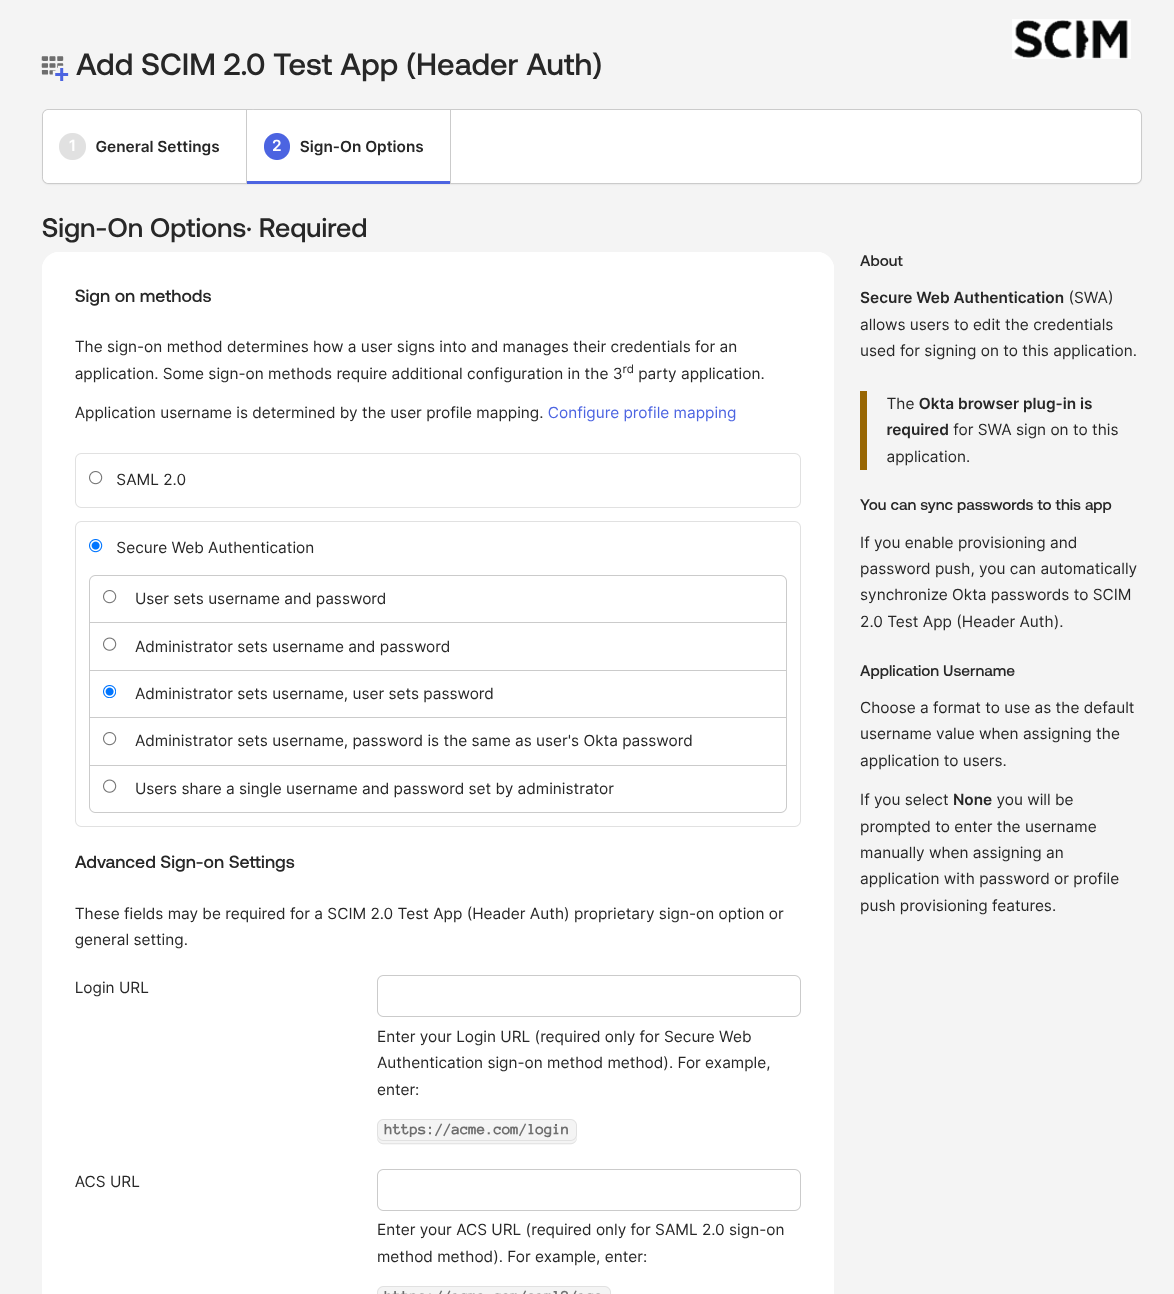
Choose Secure Web Application and configure your desired username and password setup.
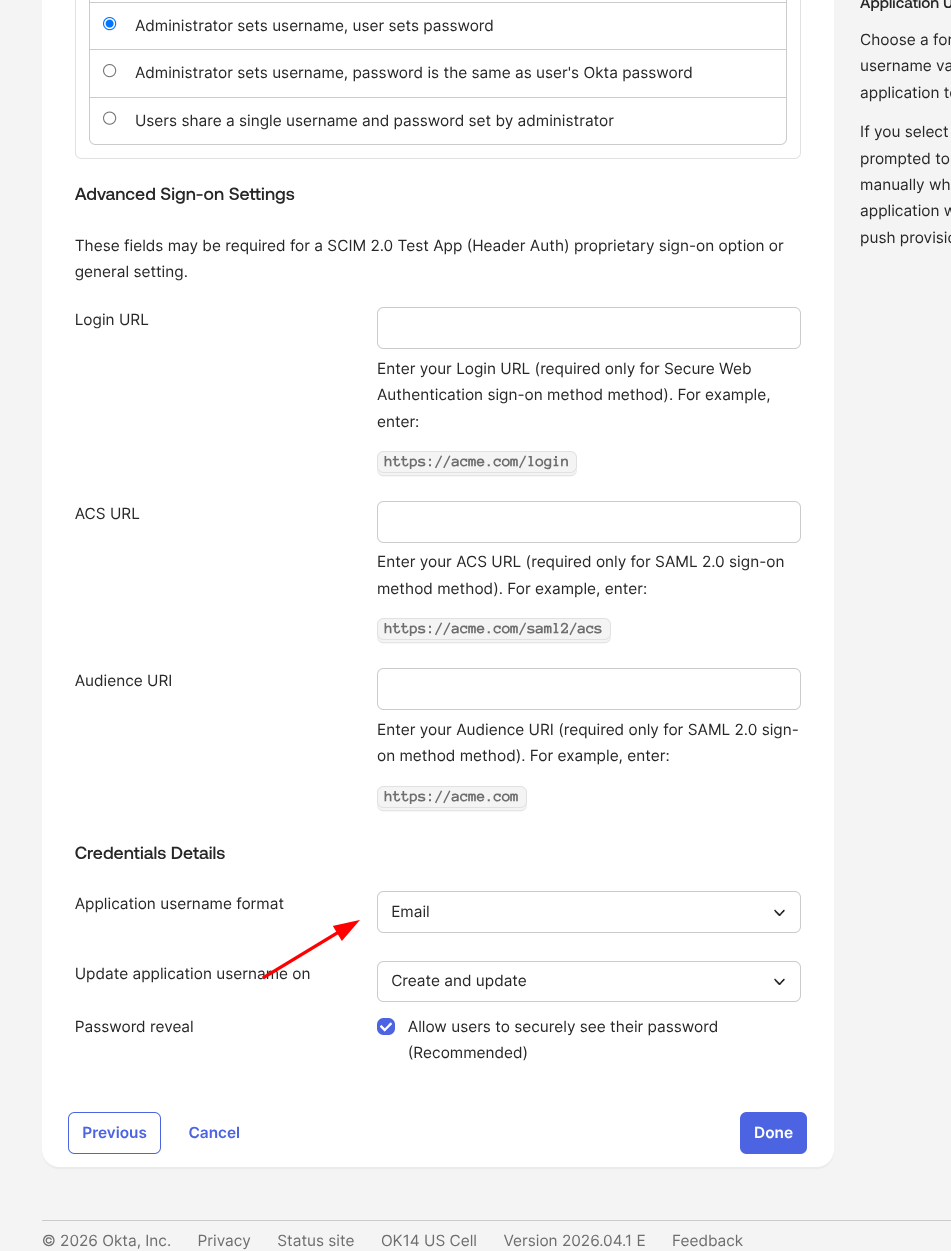
Select Email for the Application username format under Credentials Details.
Click Done to create the application.
Configure API integration for SCIM
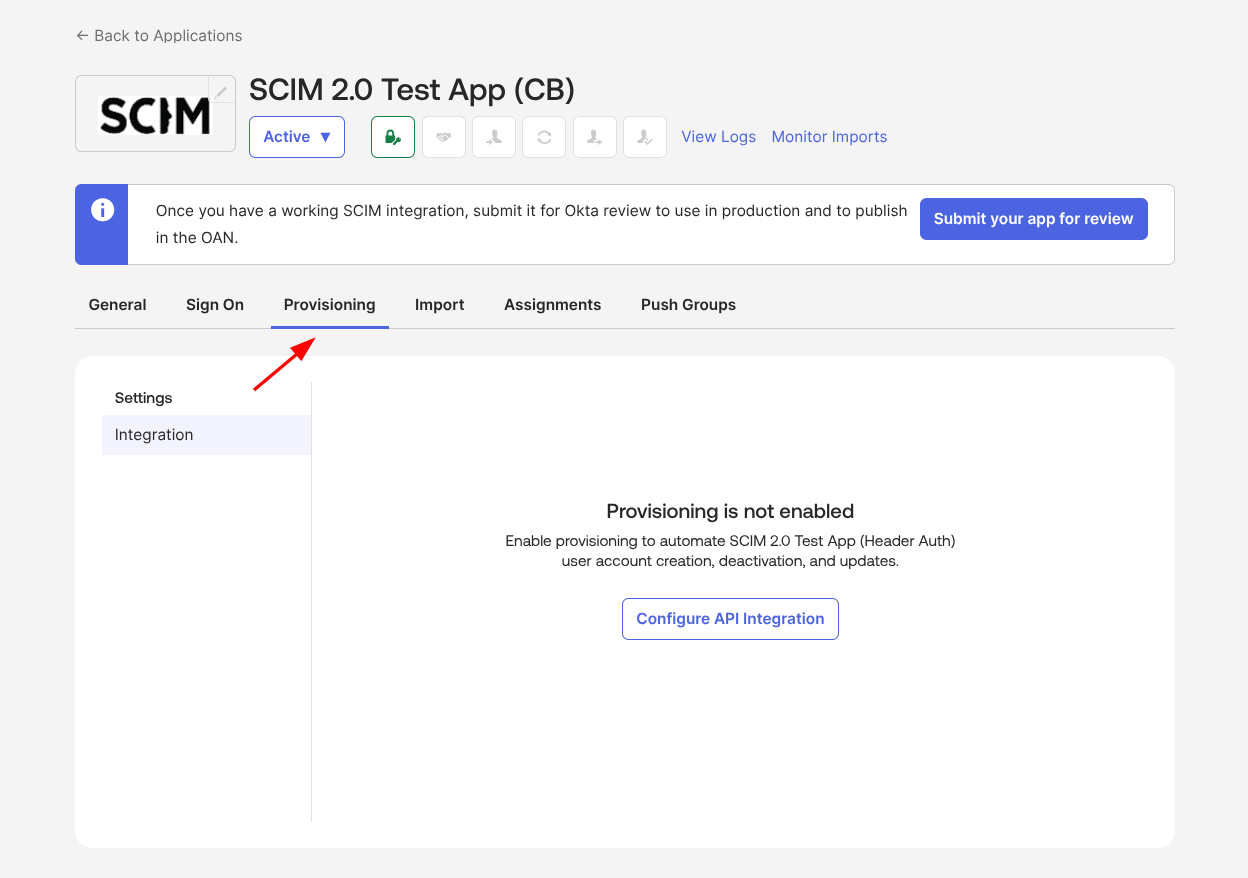
Navigate to the Provisioning tab in your new SCIM application.
Click Configure API Integration.
Check the Enable API integration box.
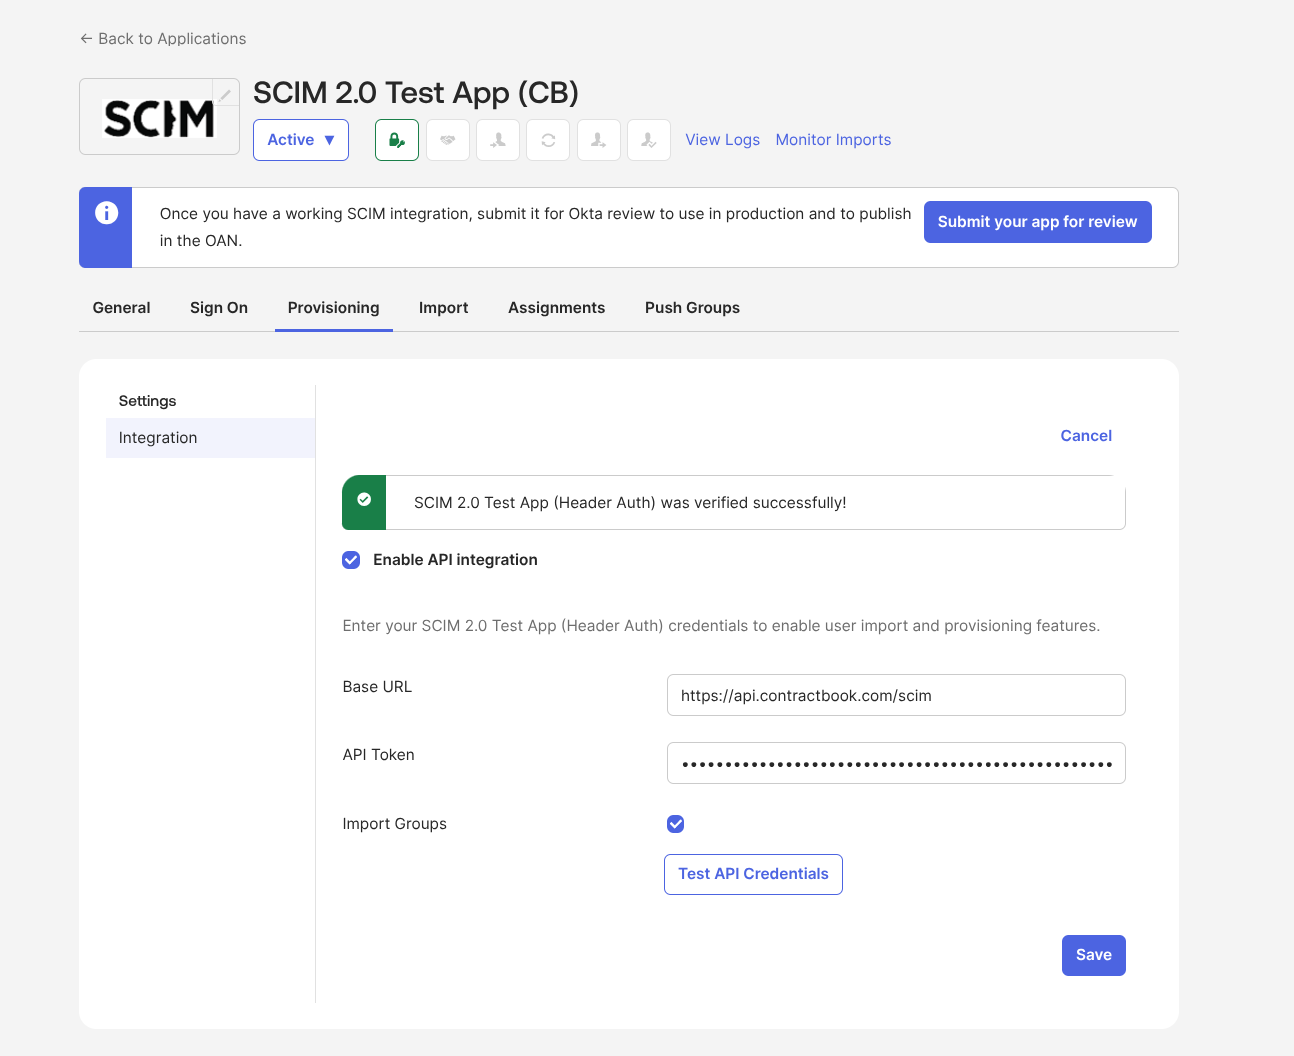
Paste the Tenant URL (https://api.contractbook.com/scim) and your Secret Token.
Click Test API Credentials to verify the connection to Contractbook.
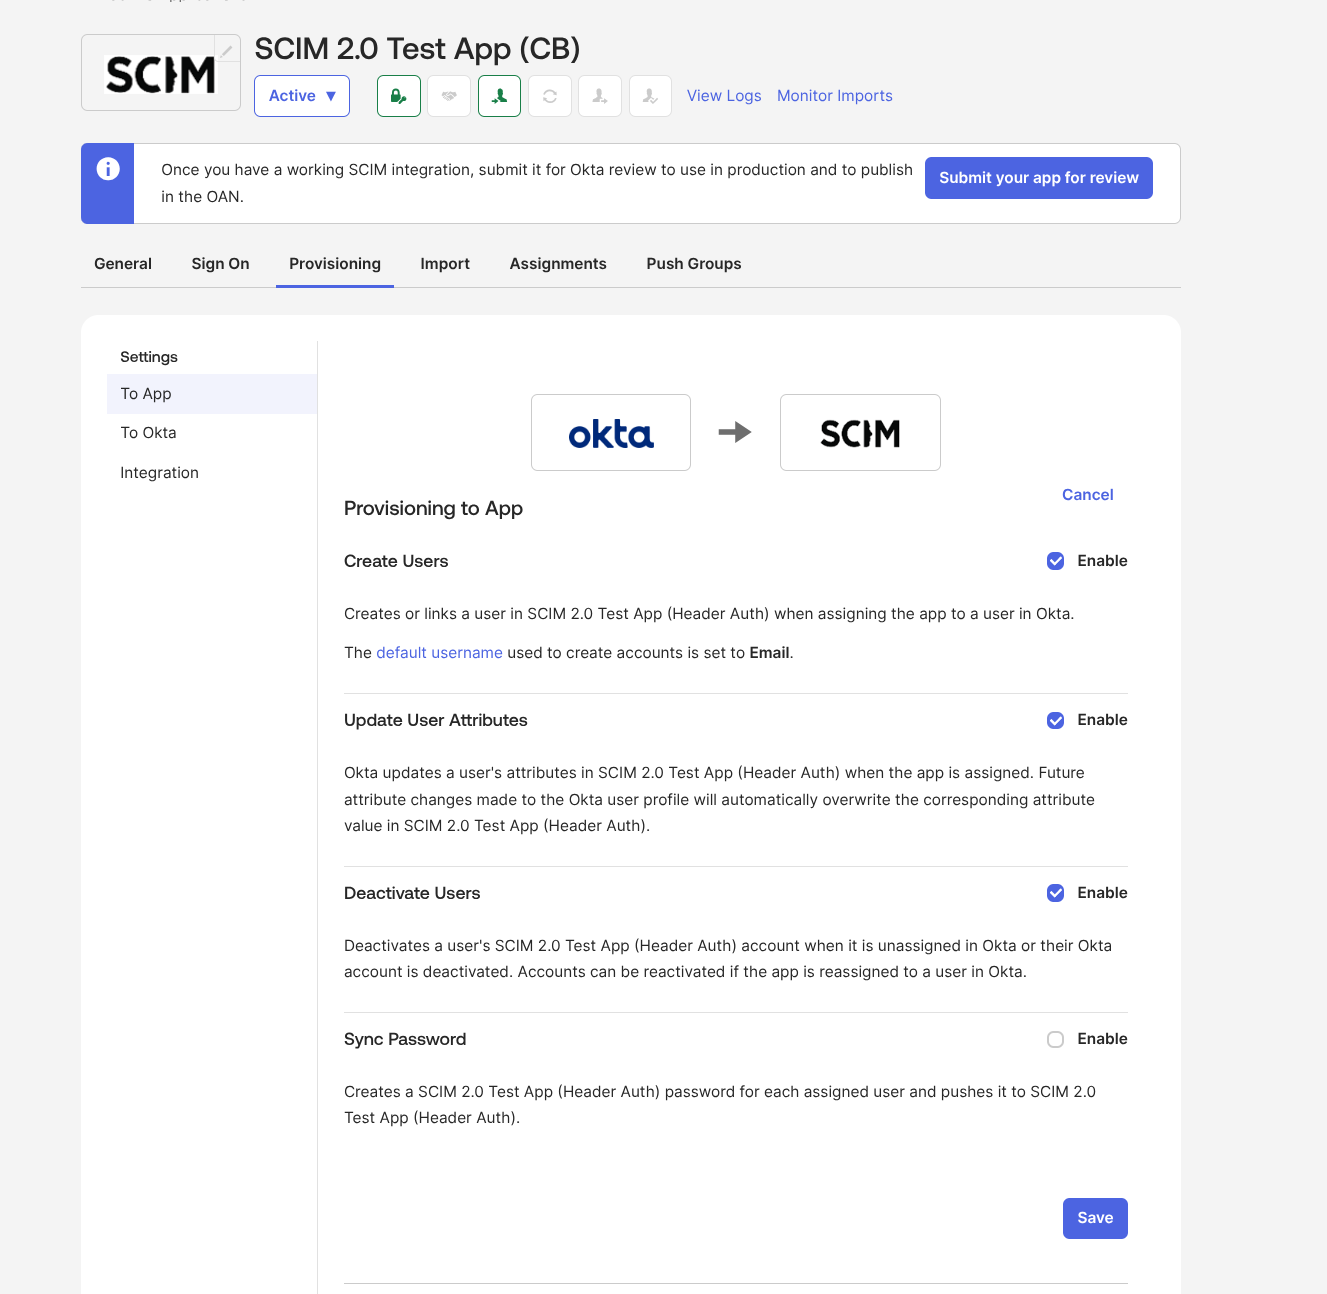
Click Save once the test is successful.
Check attribute mappings
Navigate to the Provisioning tab and scroll to Attribute mappings.
Ensure the following fields are mapped exactly:
userName
email
emailType
primaryPhone
primaryPhoneType
addressType
streetAddress
Click Go to Profile Editor to add any missing fields manually.
Provision users and user groups
Navigate to the Assignments tab to assign users.
Click Assign and choose either Assign to People or Assign to Group.
Click Assign next to the specific users or groups, then click Done.
Navigate to the Push Groups tab to synchronize group permissions.
Click Push Groups and search for the desired Okta group.
Click + Create a group to map it.
Select Push group membership immediately to sync right away, then click Save.
Pro-tip:
If you receive an "Error while creating user" with the hint "Request violates schema," ensure you have mapped all necessary attributes for your users in the Okta integration. Navigate to the Provisioning tab, scroll to Attribute mappings, and verify that the required fields (such as userName, email, and addressType) are present. If any are missing, click Go to Profile Editor to add them and resolve the error.
Related articles
SSO and user provisioning overview
How to generate API keys on Contractbook
Understand and manage user permissions
Was this article helpful?
That’s Great!
Thank you for your feedback
Sorry! We couldn't be helpful
Thank you for your feedback
Feedback sent
We appreciate your effort and will try to fix the article